For those of you who've never attempted a textile art piece before then this could be the tutorial for you.
For this tutorial you will need only you, your sewing machine and a freehand machine embroidery foot ( although not obligatory ) and some spontaneity.
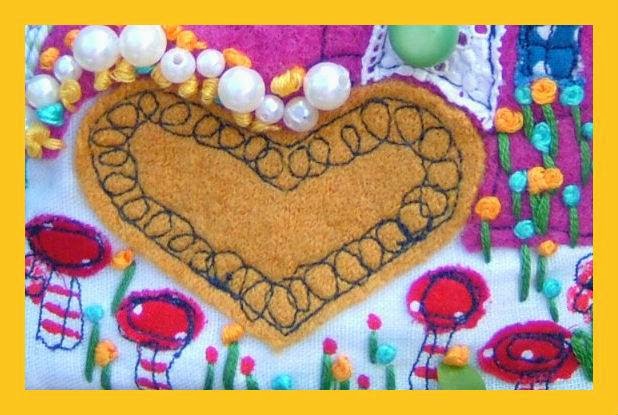
The above piece is part of a piece I made a few months ago now and is rather complex and took a lot more time than the piece will do if you follow the instructions in this tutorial BUT it gives you an idea of what you can complete if you have the passion and time for it and creating art using fabrics is really something super special, another way of using your imagination and letting yourself go into a whole new world.
Everyone has their own unique way to sew, their own style, the colours they like and the fabrics they choose, and no one way is more right than another and so this is an opportunity to really let you hair down and have some fun.
I started this tutorial by deciding that I wanted to challenge myself a little, given the time limit of 3 hours and by means of the fabrics I chose . So, I chose fabrics that are all completely different in textures, strengths and thicknesses.

There's some pink netting, hessian, 100% wool fabric and some velvet cord, oooh, I also decided along the way to add some blue corduroy.
Have a feel of the fabrics in front of you, do they already shout an idea out to you? Do you have a particular style you like, or a particular style you're used to? I followed the theme of flowers that Button Fayre loves so much and everything else was quite literally done and decided as I went along.
Next I started to think about the design I could create with what I had in front of me and used some templates I already have ( I make all of my own templates and then keep absolutely everything for future use ) to start cutting out some flower shapes.

You can make your piece as simple or elaborate as you wish too, you can add ribbons and embellishments, laces and buttons, anything you want to!
I love working with different coloured cottons and so chose a bright pink for the sewing work in my design and then started to cut out strips of the pink netting, twisting it around, to make flower shapes.
Now you're starting to get somewhere, it's an exciting feeling isn't it?
Next I set up my freehand embroidery foot to my sewing machine ( this isn't obligatory at all, I felt it easier with the thicker fabrics I have but you can sew like this with a normal foot too, I even freehand machine embroider sometimes with no foot at all! It all depends what you're used to and feel comfortable with ) and started to sew, twice, around the edges of my flower shapes.

Once I'd sewn all flowers into place I started to prepare the pink netted flowers, just by sewing along the bottoms and cutting any excess away so that it'd be easier to sew them on to the hessian and overall design.

Things really started to take shape at this point but I was also running out of time and so here's a photo of the completed flower design.......don't stop just yet though, there's still some more sewing to do.

I freehand embroidered a name into my design at this stage because I'd decided it would make a lovely gift for a friend and I also added some sequins and a hand embroidered flower. You can add anything you wish to!
The next stage involves securing your edges and you can choose a backing fabric to cover the inside of your sewing piece. Once you've measured your outlines and are happy you have the shape you would like then simply set your machine back to normal, with the normal sewing foot, and sew a tight zig zag stitch all the way around the outside of your piece. This is optional. I'd already decided to turn this design into a wall hanging and thought the outside edges might look nicer if they were finished neatly.

I then simply pinned some ribbon into place and sewed it along the zig zag stitching I'd already done to hide it a little.
Isn't it an amazing feeling once you reach this stage? I'd started this spontaneous piece with no real idea in mind of what I wanted or how it might look once complete and at this point you can sit back and admire your finished work, giving yourself a huge pat on the back.
Don't worry if it didn't turn out as you'd hoped, it's all a learning experience! I'm not a huge fan of hessian but thought this piece might look interesting with so many different textures involved. It was also a relatively fast piece to complete, all in the time limit of 3 hours but you can really go to town with lots of designs once you feel confident enough and never be afraid to try using as many types of fabrics, ribbons and embellishments as you can find.

The finished piece, a unique, handmade, piece of textile art that you can proudly hang up in your own home or give as a gift to someone special.
Enjoy!
Lucy x
No comments:
Post a Comment